 DIY Tips: How to Clean and Seal Your Deck
Actions
With summer quickly approaching, you may be wondering how you can make sure your deck, lawn, and the rest of your property look their absolute best.
Now, lawns and gardens aren't that difficult to take care of. But when it comes to your deck, you might want some guidance so you can be sure you're maintaining it properly and aren't doing unnecessary damage to the wood.
If that's what you're looking for, you're in just the right place. We're going to run through how to test the wood, apply deck cleaner, protect your deck with a deck sealer- so the weather doesn't damage it and you can enjoy it all season long.
Test the Wood
Before moving forward with sealing your deck, it's important to ensure that the wood is going to be able to absorb sealer.
How do you test the wood?
It's easy. Simply sprinkle the deck with water! If the water soaks right in, you're safe to seal your deck. If the water beads up, it may not be time for sealant just yet.
How to Apply Deck Cleaner
Just as they do to our bodies in the summertime, UV rays are also penetrating everything else outside... including your deck.
This can cause the wood to gray. When you use a deck cleaner, though, it will help to remove stains, dirt, and other pesky bits like mildew and algae. Unless your deck is brand new, you'll want to treat it with a cleaner prior to using a sealant.
Why? If you don't prepare your deck, any sealant you apply may not adhere fully which could cause it to fail. Don't neglect this critical step!
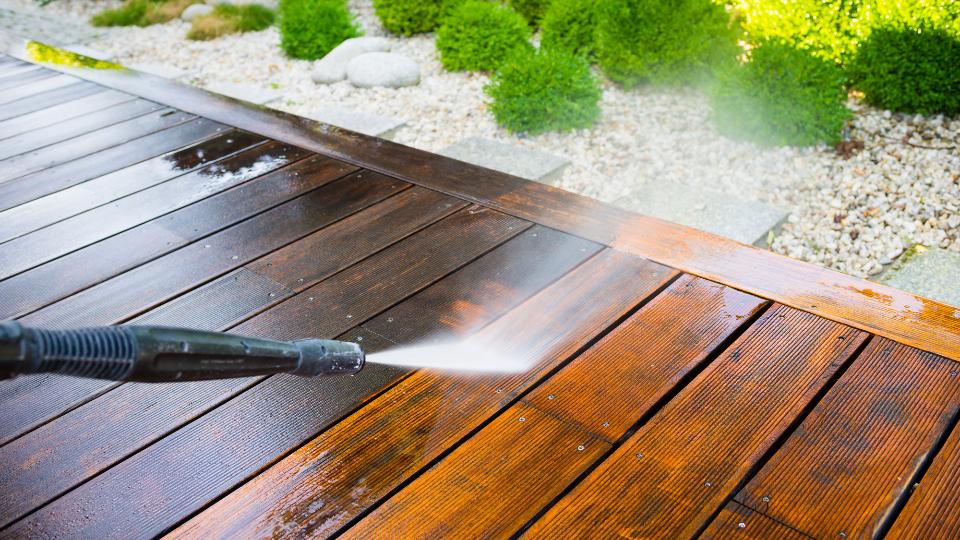
Using a Pressure Washer
Are you thinking about using a pressure washer to assist with cleaning your deck?
It's not uncommon, but you want to be sure that you follow the manufacturer's instructions regarding what wood cleaner you should use and how far the spray tip should be from the area you're cleaning. If you don't want to damage the wood, using a fan tip is a wise choice.
Also, it's smart to test the pressure washer on a small area first before going straight for your entire deck.
Step 1
Assuming that you've removed all of your outdoor furniture, replaced any damaged or loose boards, swept the deck, and covered any outdoor plants or deck planters you may have, it's time to apply the cleaner.
Read the directions listed on the deck cleaner. If it states that you should dampen the deck, do that. If it's supposed to be dry, leave it as-is.
Apply cleaner to the entire deck. Be sure not to let it pool on the deck at any point in time. To apply the cleaner, you can use a stiff, bristled brush, a paint roller with a handle, or a garden sprayer.
Step 2
Keep the deck wet using the cleaner and don't allow it to dry.
To do this, you can have someone help you and back-roll the deck as you spray. They'll use a roller to spread the cleaner out after you've sprayed it so that it doesn't collect in puddles and the deck continues to stay wet.
Step 3
Scrub any areas that are giving you trouble with a stiff, bristled brush or a broom - but not one that's made of wire, because the wire bristles could break off and cause your deck to form rust spots.
You definitely don't want rust spots after all of your hard cleaning work!
Steps 4 & 5
Take another look at the cleaning product's instructions.
Follow the instructions to give the deck cleaner time to soak and really absorb into the deck. Soaking time will vary depending on the product you're using, but it's usually not longer than 10 minutes.
Finally, once your deck has absorbed the cleaner, rinse it thoroughly. You can use a typical garden hose, or the pressure washer you may have used earlier on.
How to Apply Deck Sealer
When you're applying a sealer or stain of any kind, it's critical to always read and follow the directions, as drying times are going to differ according to the air temperature where you live, and humidity.
Before you start, take a walk around your deck and make sure that you haven't missed any popped nails or split or damaged boards. If you can fix any issues before starting, your deck will look that much better in the end.
Now, let's get down to it!
Step 1
Take a look at the weather and try to find a time where you'll have two days of clear, dry weather with temperatures between 50 and 90 degrees Fahrenheit.
Step 2
Just as you did before applying the cleaner, you'll want to remove all of the outdoor furniture, give the deck a thorough sweep, and cover your outdoor plants.
Step 3
Stir the sealant thoroughly, but don't shake it.
Step 4
After stirring the sealant, you want to apply a thin coat over a small section of the deck using either a paint roller with a handle or a garden sprayer. For a small section, we would suggest going over two or three boards at a time. Be sure to use thin coats rather than thick ones -- otherwise, they may not fully adhere or dry correctly.
Again, don't let the sealant pool on the deck. Back-roll the same way you did when you were applying the cleaner.
Steps 5 & 6
Continue to repeat step four until you have thoroughly covered your entire deck.
If there are areas that are difficult to reach or hard to get to with the paint roller or sprayer, you can use a brush.
Finally, allow the deck to dry before replacing any furniture and/or plants.
Looking for More Great Home Improvement Resources and Tools?
Prepping, cleaning, and applying deck sealer to your deck wasn't so difficult, now was it?
At Lakeland Co-op, we offer plenty of great resources and tips on our blog, like 7 spring repairs for your home - and we also offer the tools you need to get them done!
Stop by today and see what we have to offer. You're at home here.